Configure SMTP
The WP Mail SMTP Plugin plugin allows users to configure a proper mail deliver, by ensuring the emails are sent when requering.
The following steps will explain how to activate, configure and test the plugin.
Activation
-
Go to
https://<my-site>.web.cern.ch/wp-admin, and sign in asAdministrator. If you do not have this role, please ask to your site administrator to configure the plugin. -
On the left side of the window, go to
Pluginsand Activate it.

Activating the FluentSMTP plugin.
Configuration
Once activated, it's time to configure it. Let's go through the wizard.
- On the left side of the window, go to
Fluent Formsand click on SMTP. - Click on
View FluentSMTP Settings

Configuring FluentSMTP.
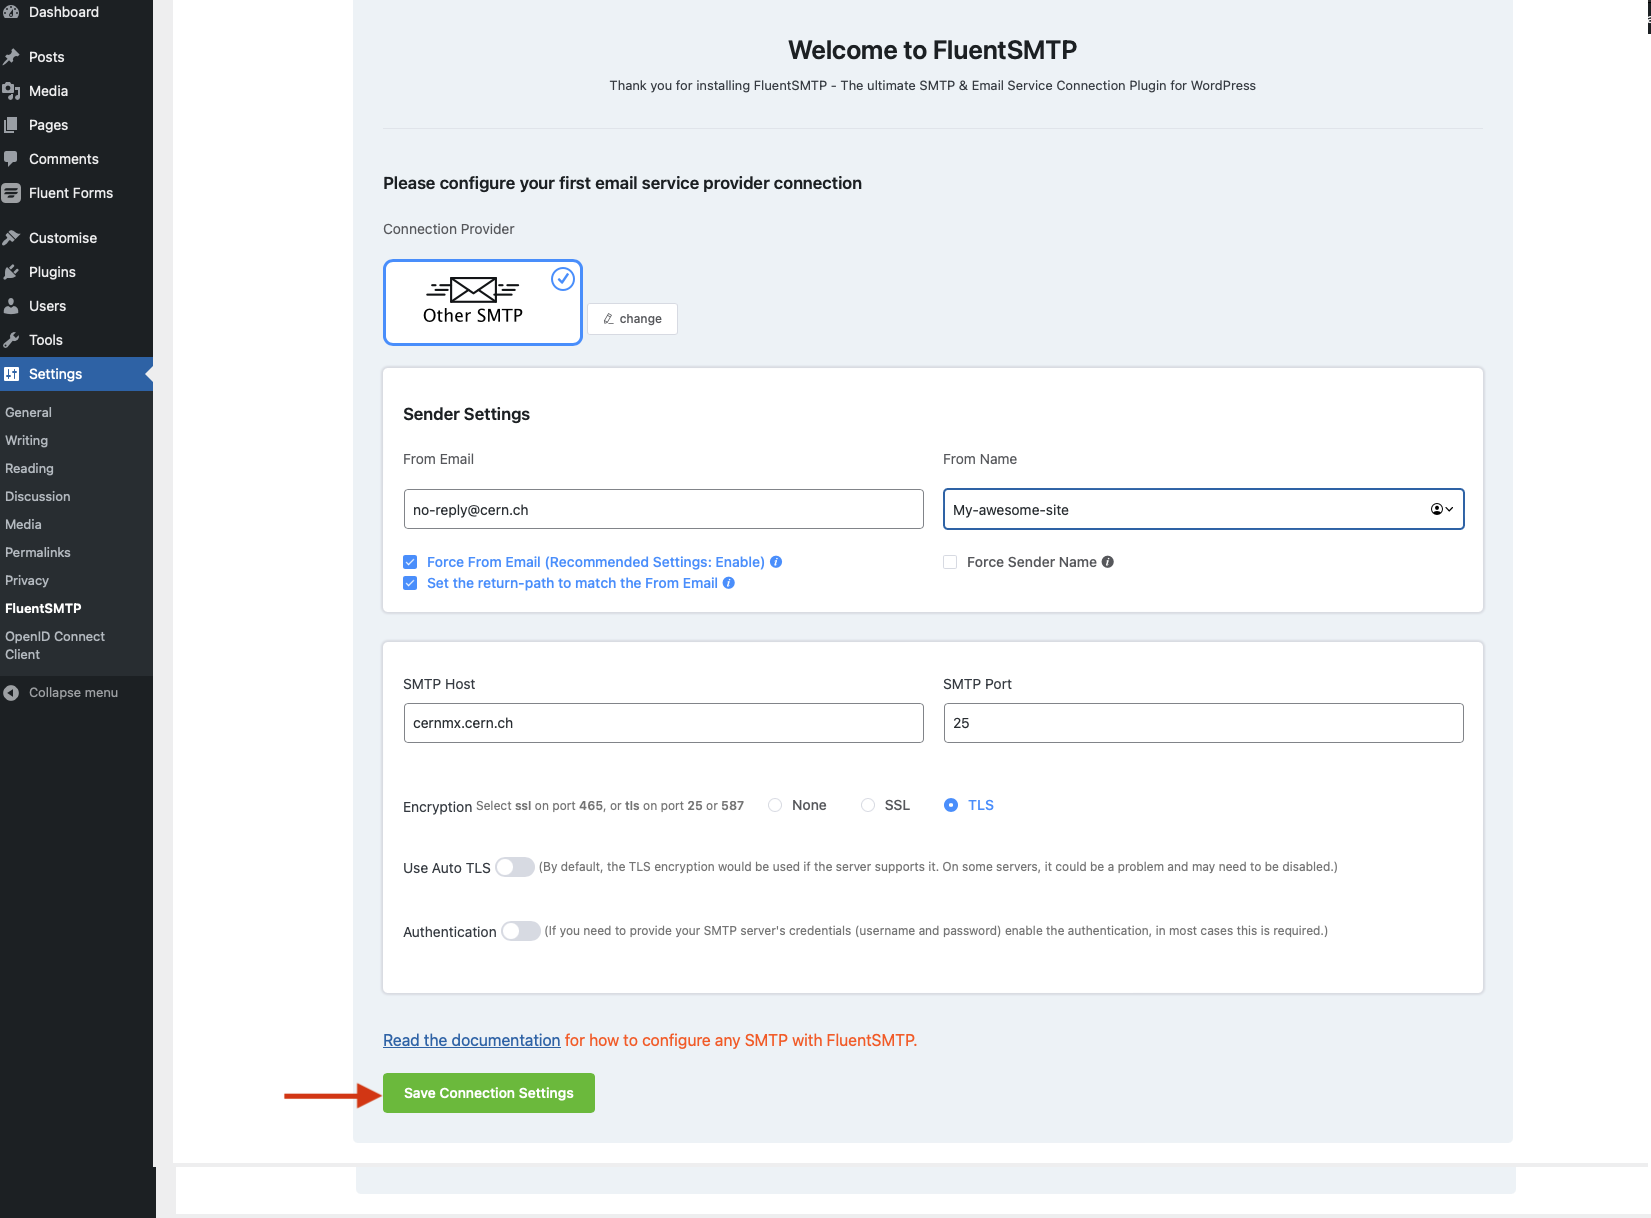
- We choose the SMTP Mailer. We will go through the
Other SMTPoption:

Configuring FluentSMTP.
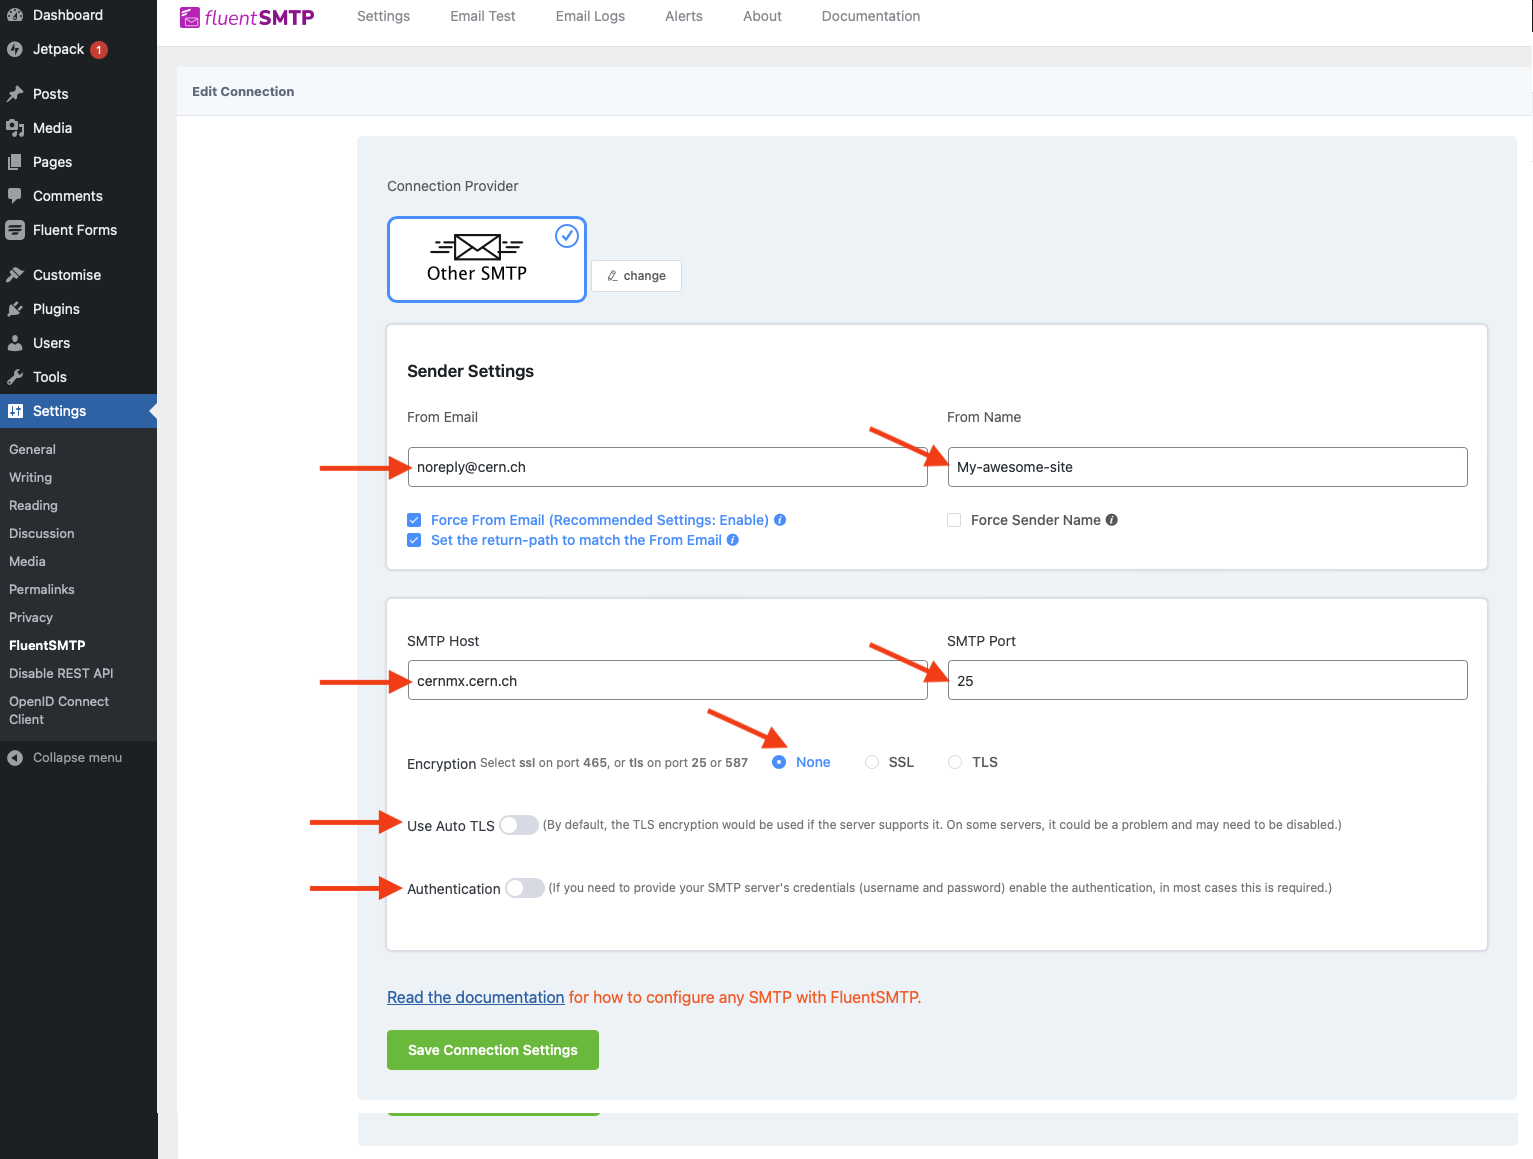
- In the Configure Mailer Settings, set the following values:
Configuring FluentSMTP.
- From Email: you can leave your account, or using
noreply@cern.ch. - From Name: this is up to the user, but recommended to leave it as it is.
- Force From Email: this is up to the user, but recommended to leave it as it is. With this enabled, all the forms will use the same from email
- Force From Email: this is up to the user, but recommended to leave it as it is. With this enabled, you'll be emailed using "From Email" if any messages bounce as a result of issues with the recipient's email.
- SMTP Host:
cernmx.cern.ch. - Encryption:
None. - SMTP Port:
25. - Auto TLS: turn it
off. - Authentication: turn it
off.
- Finally, click on Save Connection Settings.
Configuring FluentSMTP.
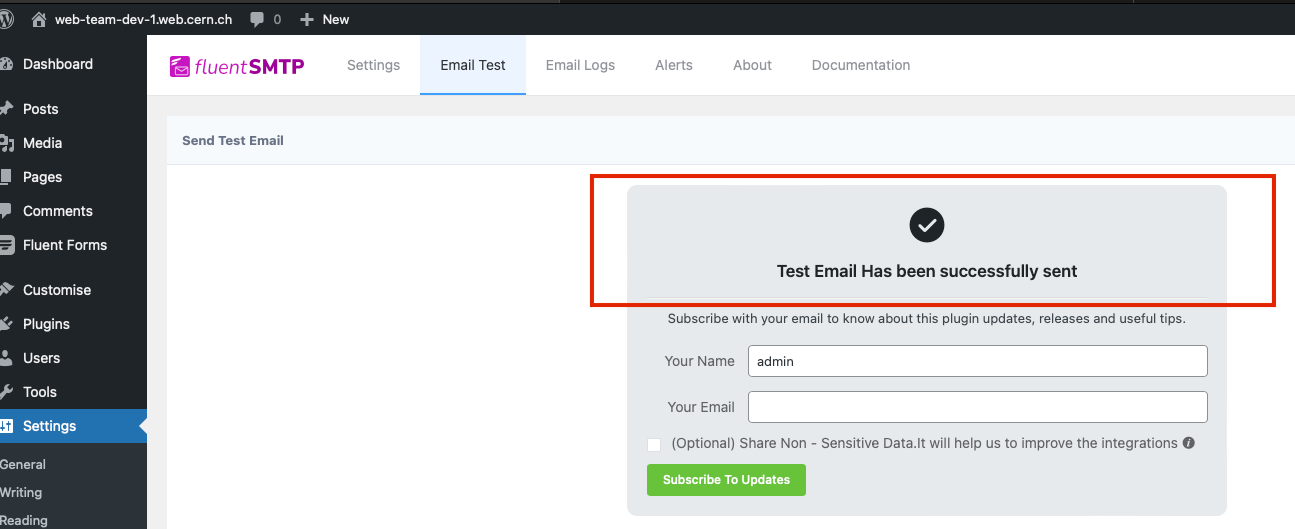
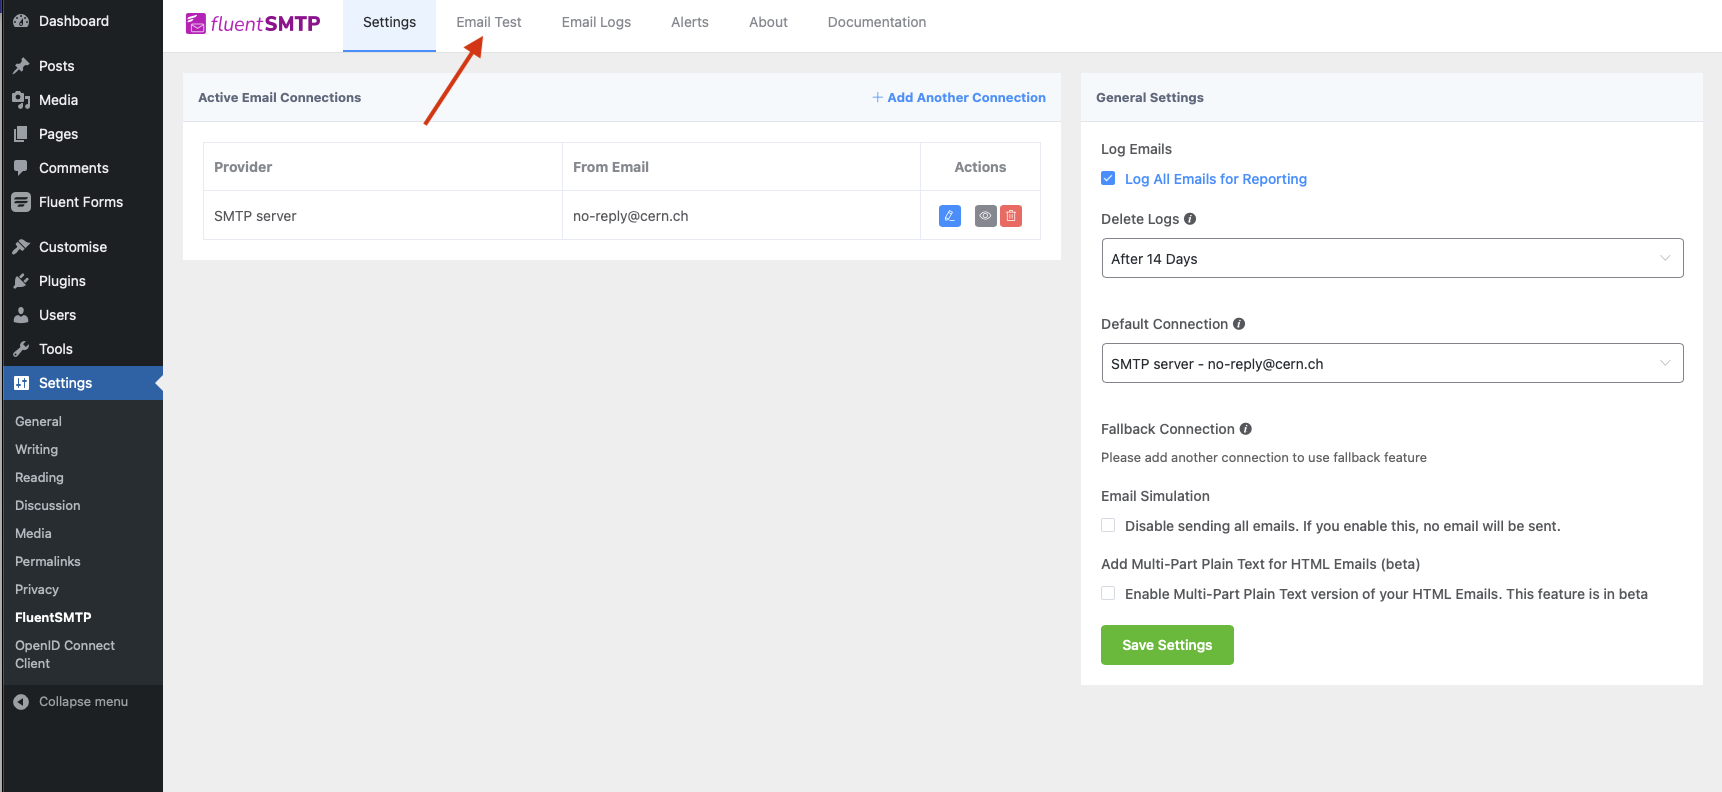
Testing
- To see whether our configuration is properly set, send a test email to verify it. On the toolbar, go to the
Email Testtab.
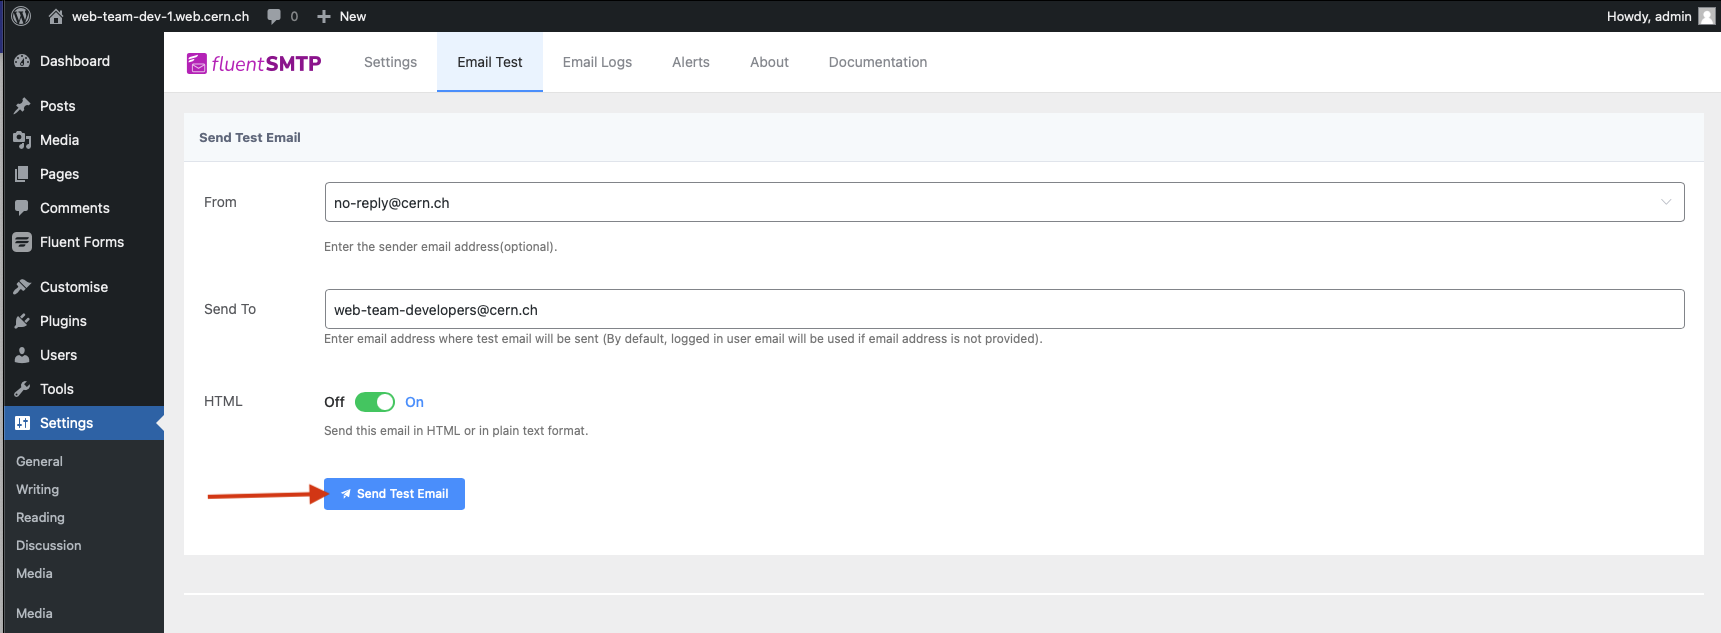
- In the test configuration, let's set the following values:
- From Name: enter the sender email address (optional, the site will load the one inserted in the previous step if leaved blank).
- Send To: the email address where test email will be sent.
- Send the email!
- You will get a confirmation window informing you about the result of the test. There is no need to Subscribe to updates