Configure CERN SSO
The OpenID Connect Generic Client plugin allows users to login by using their CERN account, and it comes installed by default in our WordPress instance.
To configure it, make sure you have followed the instructions under 1-configure-wordpress.md.
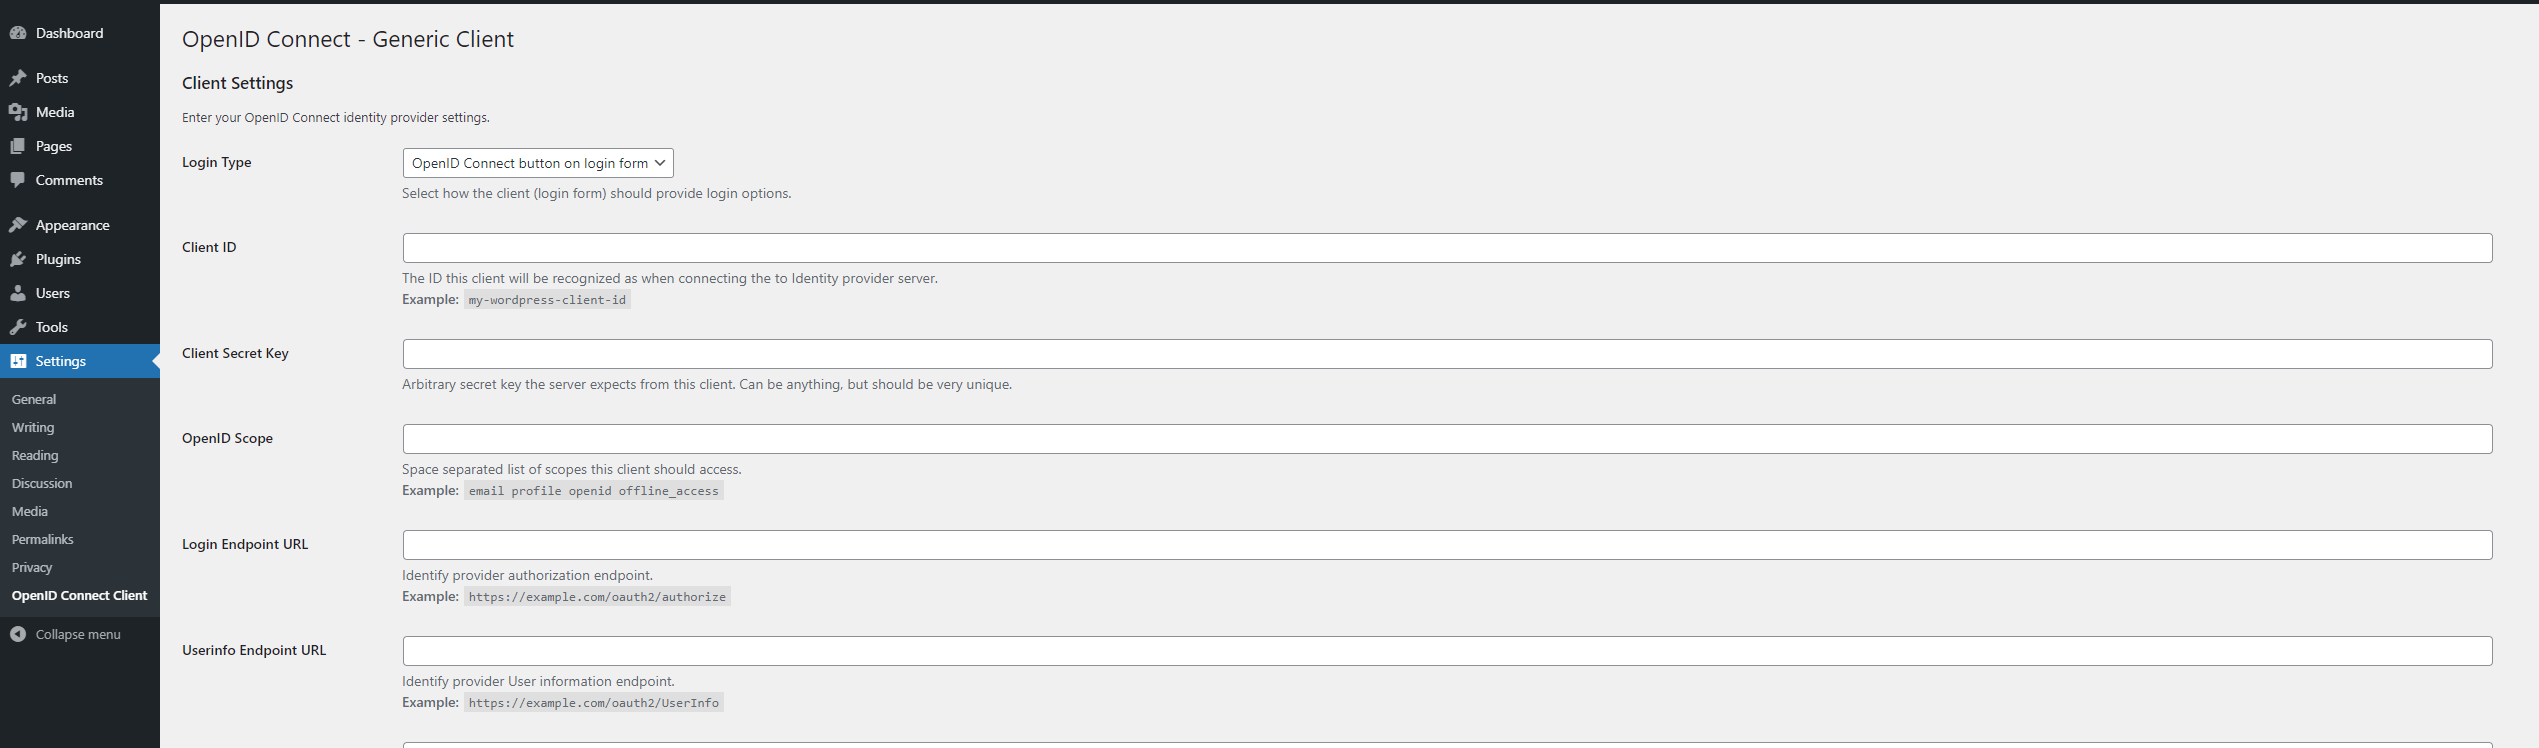
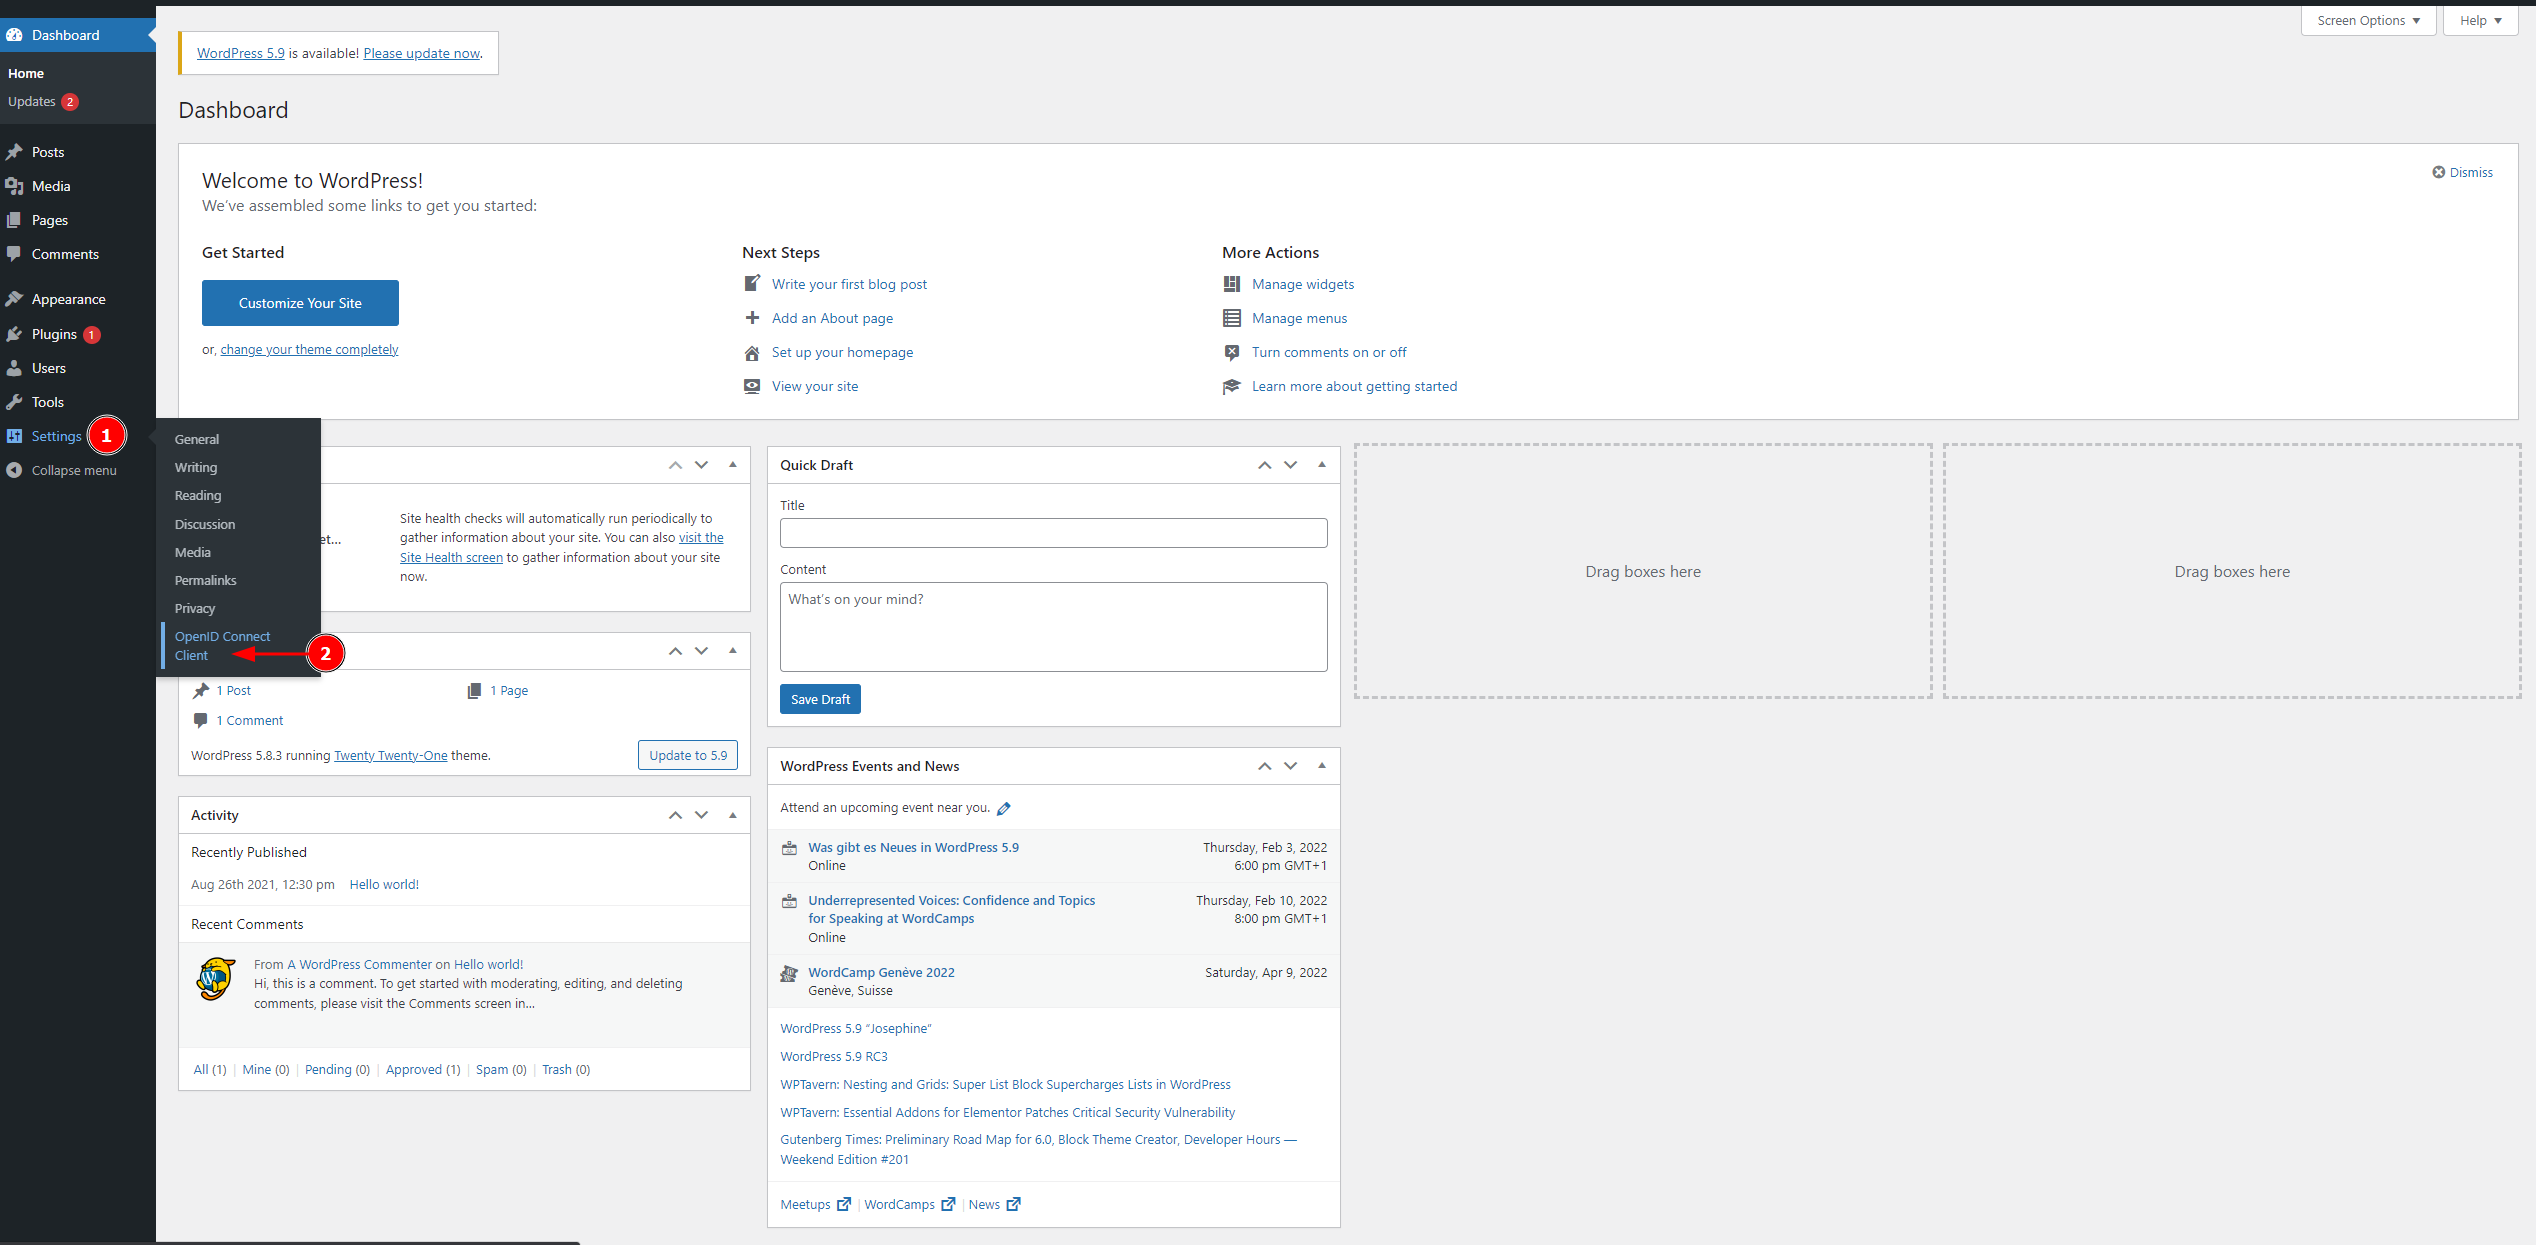
To proceed, on the left side of the window, navigate to Settings > OpenID Connect Client:

In this new window, we will need to configure several fields.
For the Client ID and Client Secret Key fields, we can re-use the ones that come with our namespace.
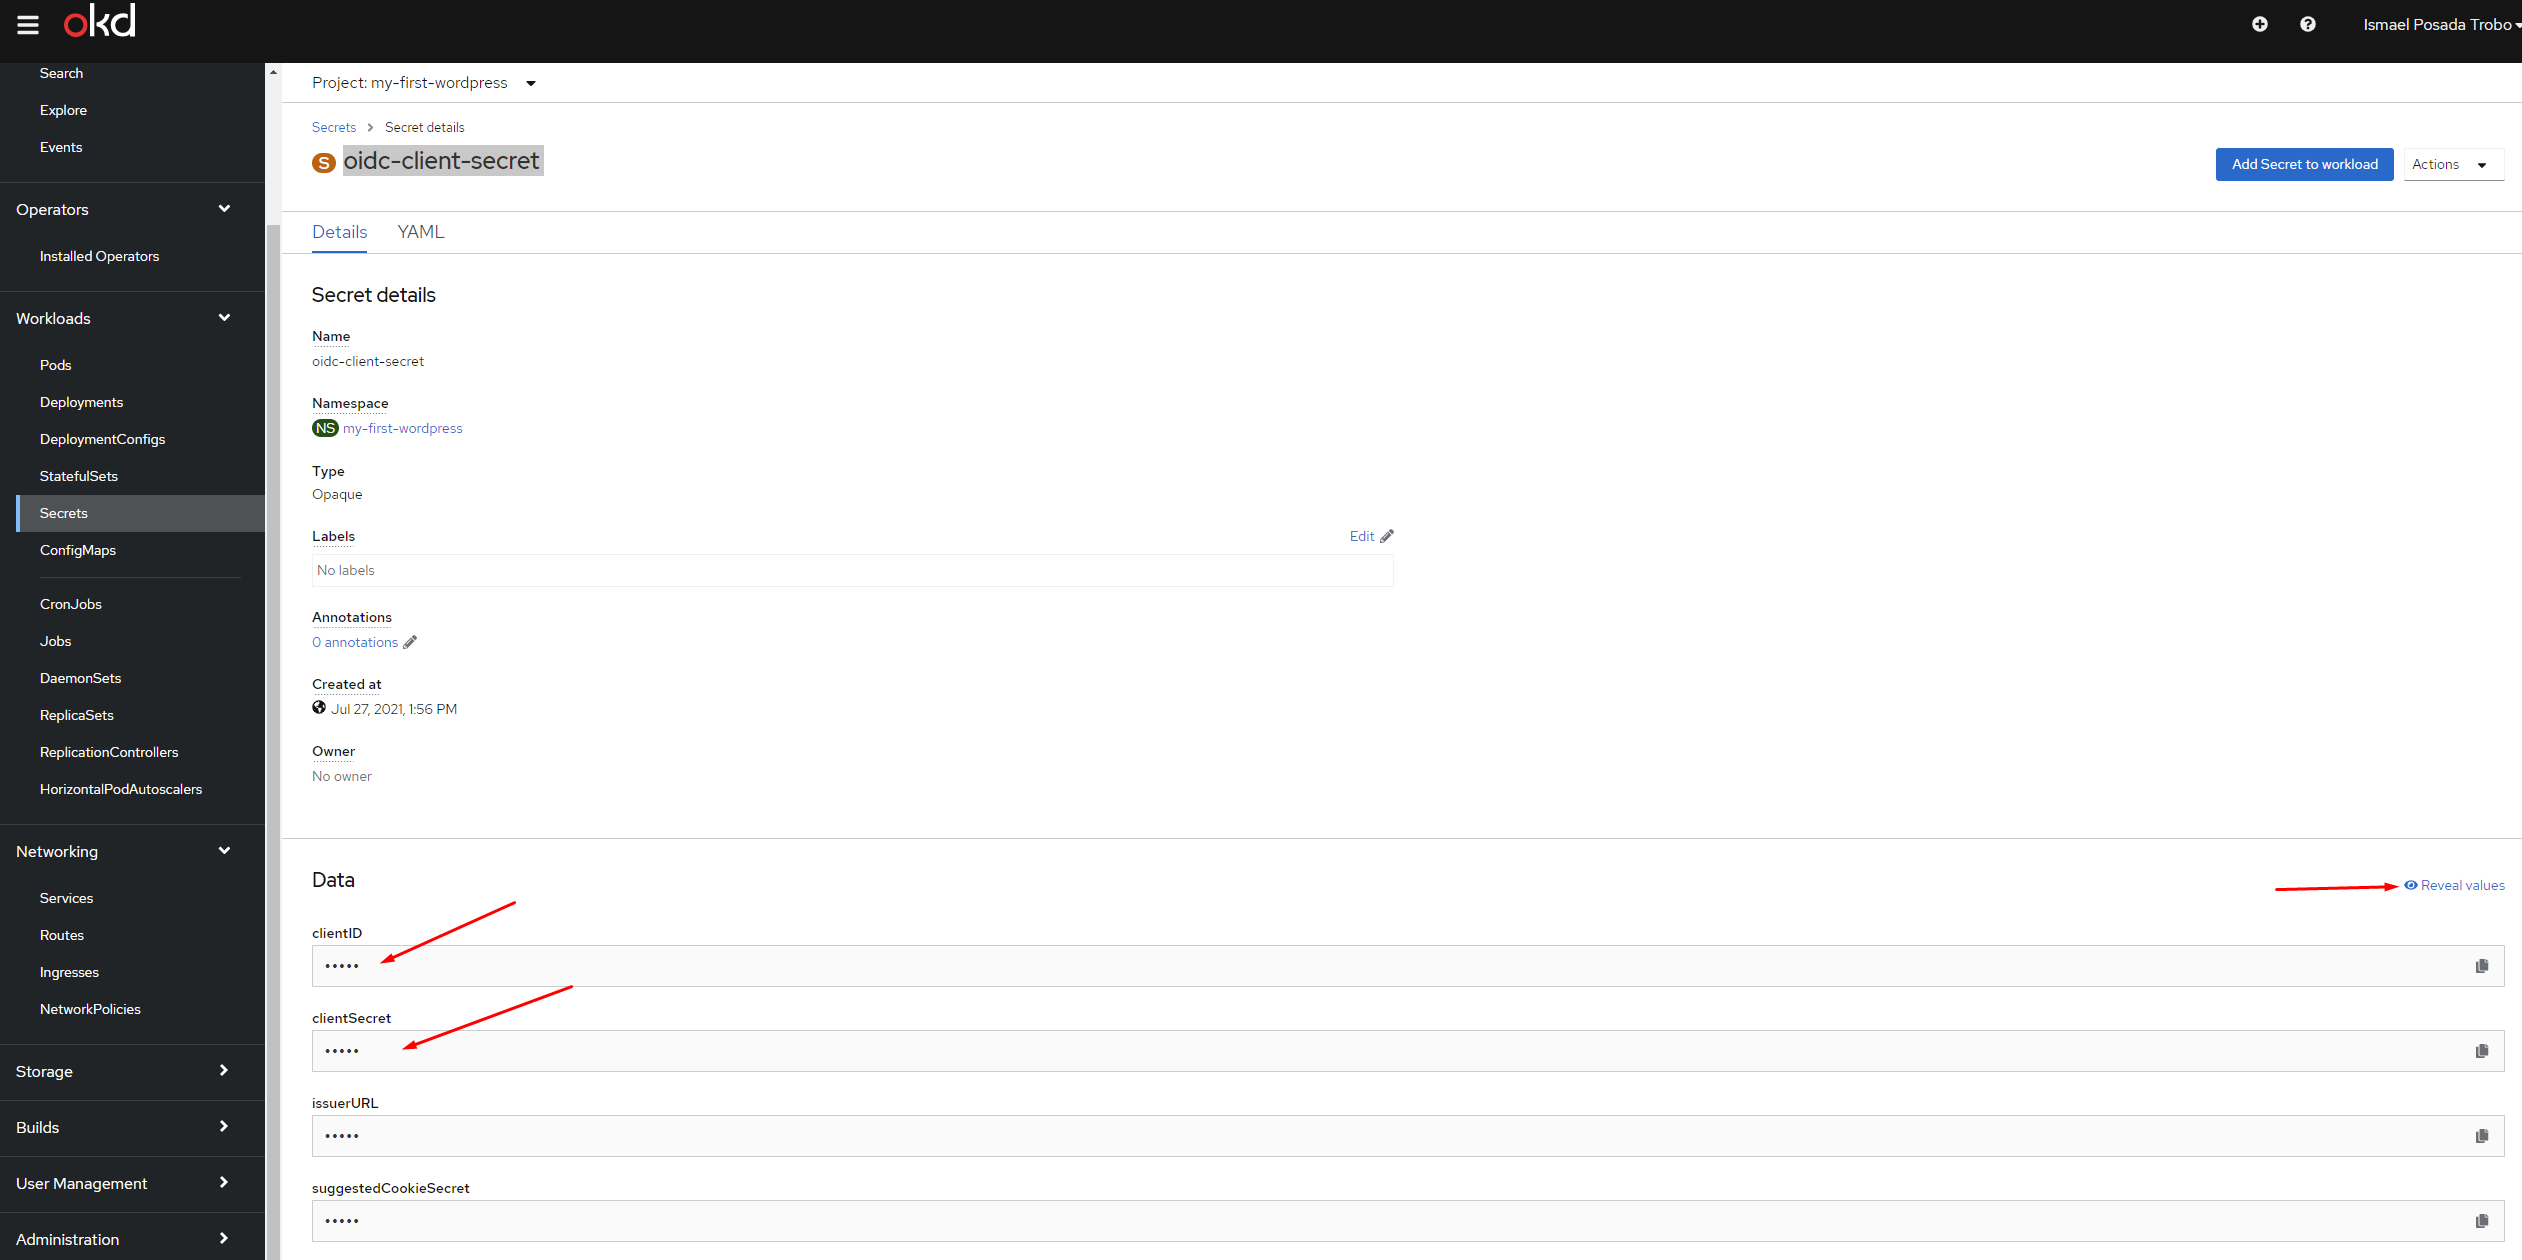
To do so, navigate back to the https://app-catalogue.cern.ch cluster, select your WordPress project, change the environment to Administrator, and under Workloads, go to Secrets. Click under the oidc-client-secret secret resource:

Once in the oidc-client-secret secret window, copy the values from clientID and clientSecret, by clicking on the Reveal values button on the right:
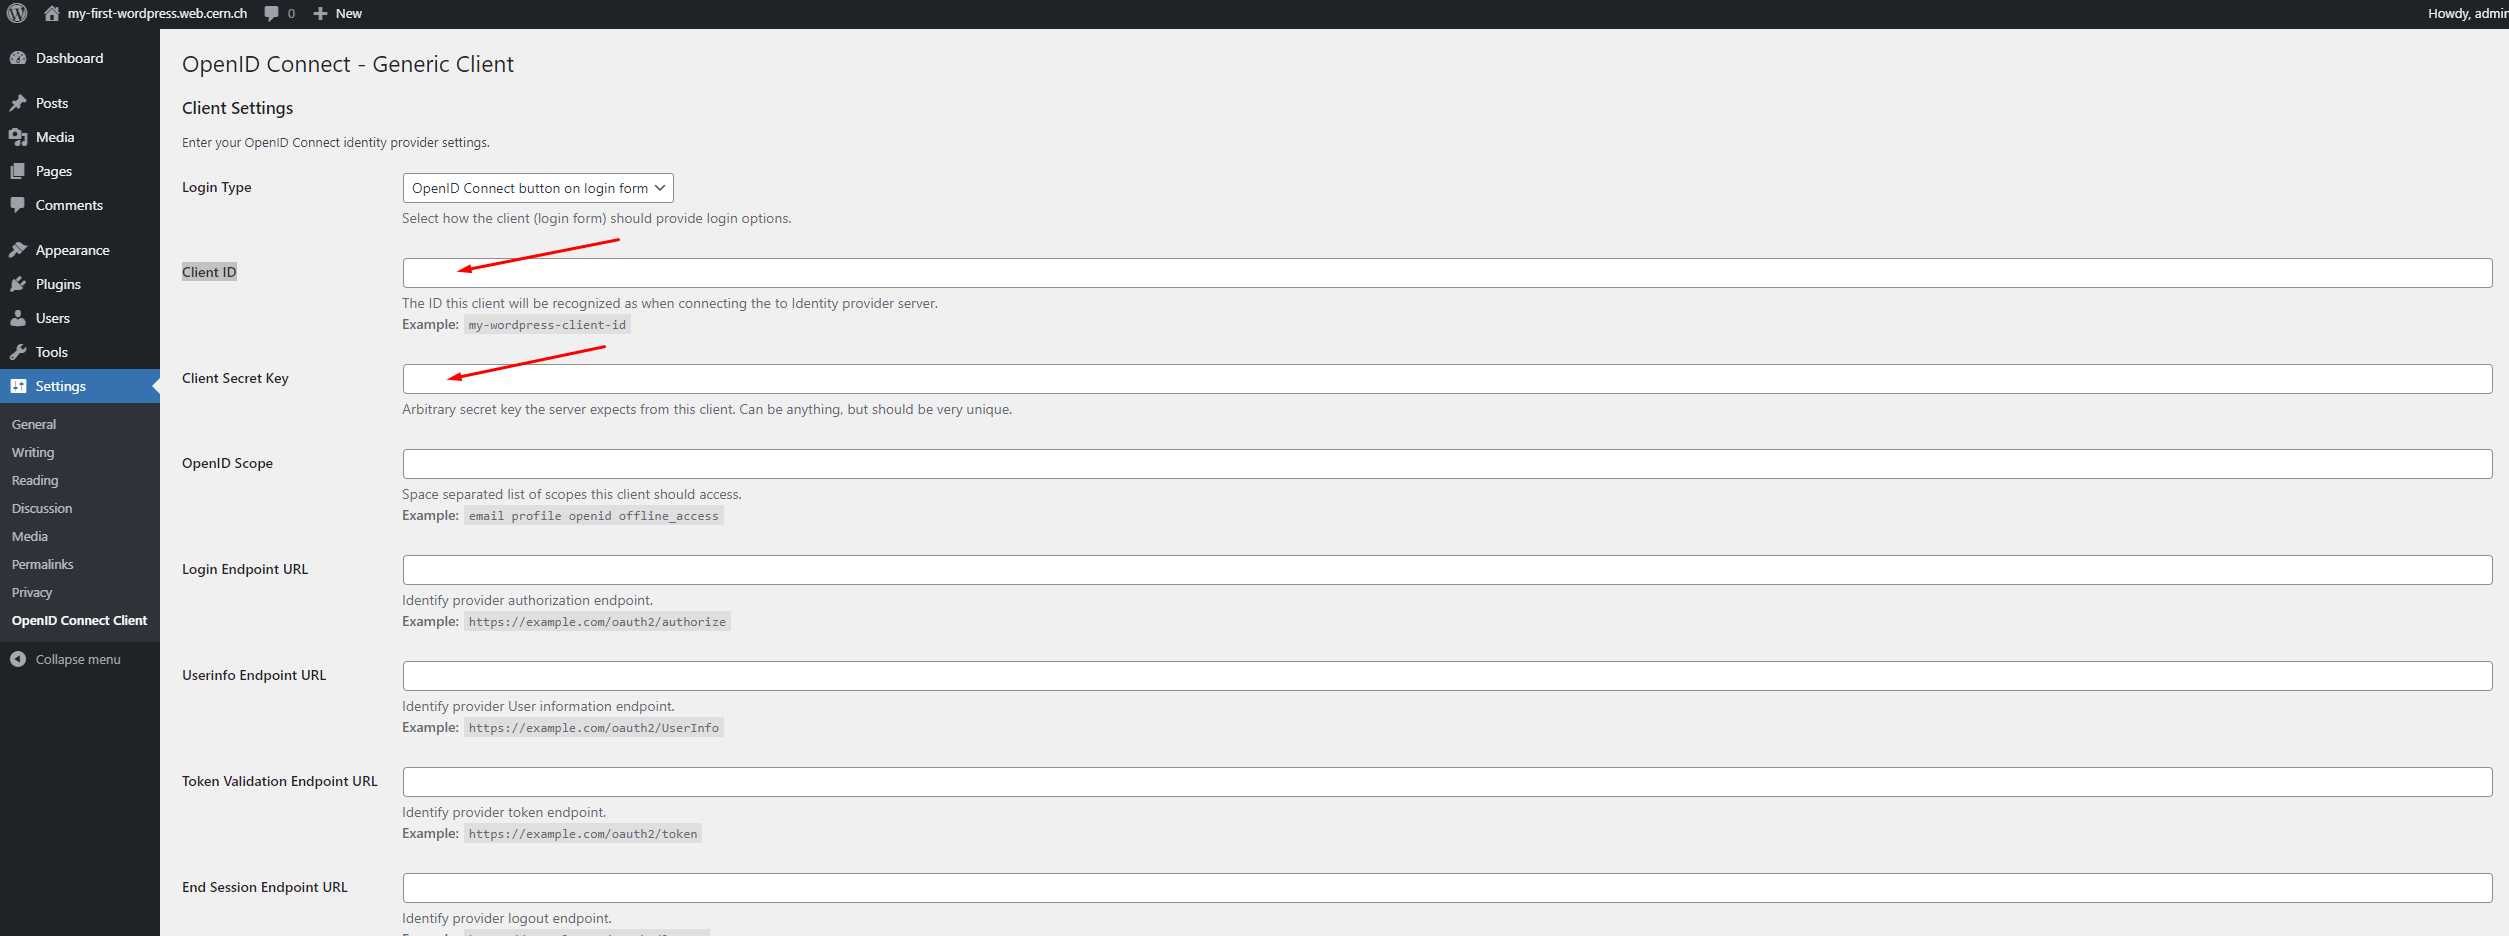
Now, back to the WordPress administration page, paste these values under their corresponding fields:
Other mandatory fields needed:
- OpenID Scope:
openid - Login Endpoint URL:
https://auth.cern.ch/auth/realms/cern/protocol/openid-connect/auth - Userinfo Endpoint URL:
https://auth.cern.ch/auth/realms/cern/protocol/openid-connect/userinfo - Token Validation Endpoint URL:
https://auth.cern.ch/auth/realms/cern/protocol/openid-connect/token - End Session Endpoint URL (replace \
by yours): https://auth.cern.ch/auth/realms/cern/protocol/openid-connect/logout?redirect_uri=https://<my-site>.web.cern.ch - Link Existing Users: ☑ (
checked). This is important, otherwise if your CERN account was set as theWordPress admin email, login with this account will fail if leave unchecked. See troubleshooting section.
Finally, click on Save Changes to persist your changes.
Note that the Redirect URI value is automatically propagated to the application in the application portal by the operator, and no further action is needed.
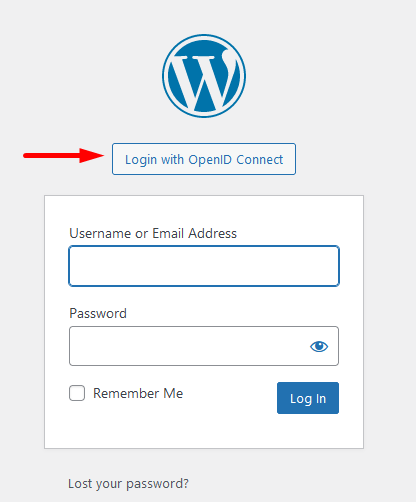
From now on, if we access https://<my-site>.web.cern.ch/wp-admin, we should see the corresponding OIDC button that will allow us to connect as our CERN account.
If we want the CERN SSO login page to appear instead of this, we must set Login Type to Auto Login - SSO under the previous OpenID Connect Client settings.
Info
Note that from now on, if we login with our WordPress admin email set when provisioning the WordPress instance in 2-create-wordpress-instance.md, we will see that our account has been automatically mapped to the admin local account.
Access control for our WordPress site
It might happen that we want our WordPress site to be accessed through CERN SSO, i.e., enforcing users to login in order to access our site. To accomplish this, and after following previous configuration about configuring CERN SSO, we need to do the following:
First, we need to access the administrative part of our WordPress site by going to https://<my-site>.web.cern.ch/wp-admin, and login as administrator.
Once in, we go to Settings > OpenID Connect Client
Then, scroll down until you find the Enforce Privacy setting, and ensure it's ☑ (checked). Finally, Save.

At this point, if you access https://<my-site>.web.cern.ch/, you will be required to login in order to see the site.
Restrict access control to an specific e-group
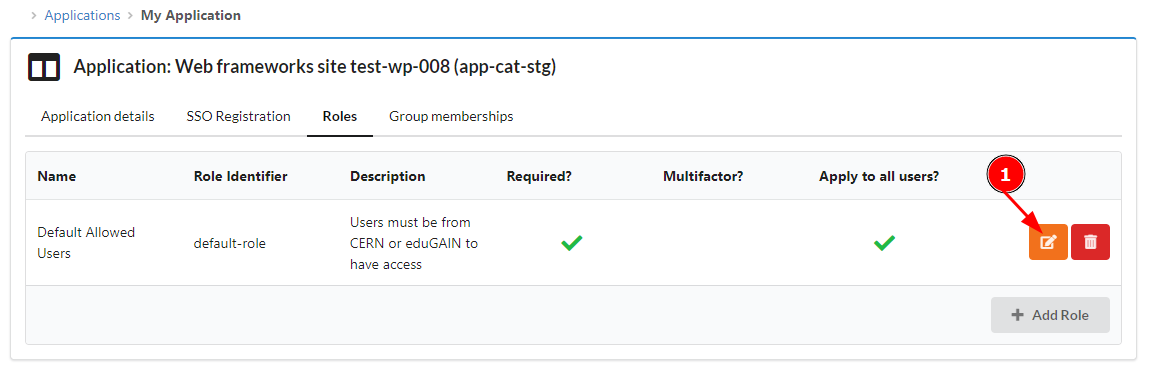
Who will be able to login in into our WordPress site? This can be configured by going to our Application portal, and looking for the registered application of our WordPress site. If you WordPress site is called https://<my-site>.web.cern.ch/, then we should look for the application registration webframeworks-app-catalogue-<my-site> (if in the staging cluster, look for webframeworks-app-cat-stg-<my-site>).
By default, there is a default Role called Default Allowed Users, configured with a EduGain with SIRTIFI Level of Assurance. See Role requirements for a more detailed explanation. Basically, this Role ensures that people with a CERN account plus people from institutions part of the EduGain identity federation can login in (can see) your site.
In the case that we want to restrict the access to our WordPress site to an specific e-group, we need to edit the default Role.
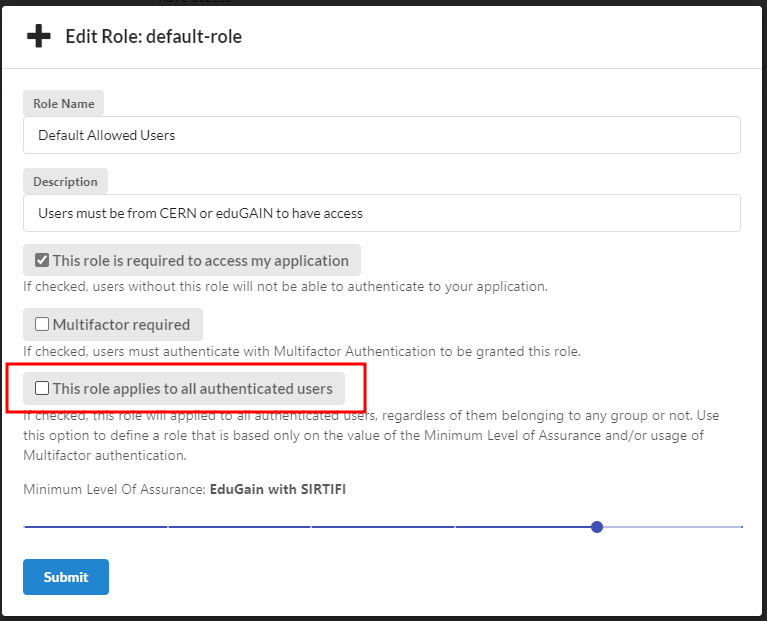
In the new window, uncheck the part where it says This role applies to all authenticated users and Submit the change.
The resulting Role will be as follows. We now just need to click under the Assign role to groups:
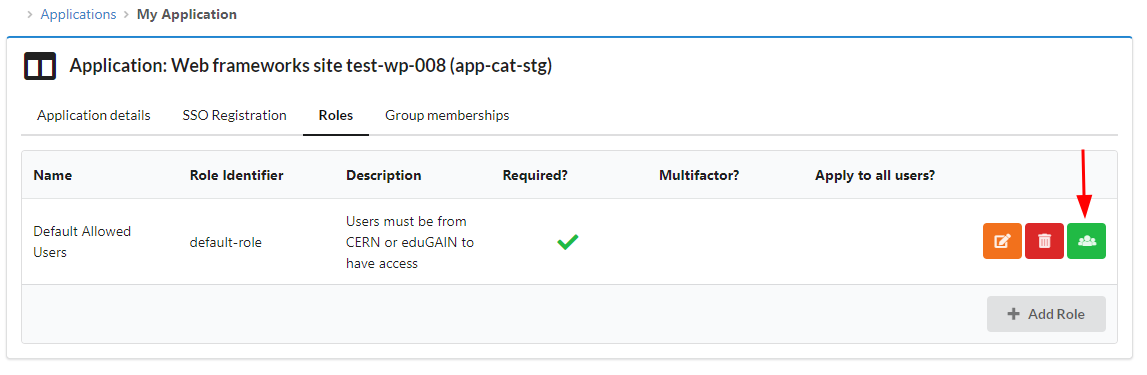
And finally add the e-group that will be able to access our WordPress site.
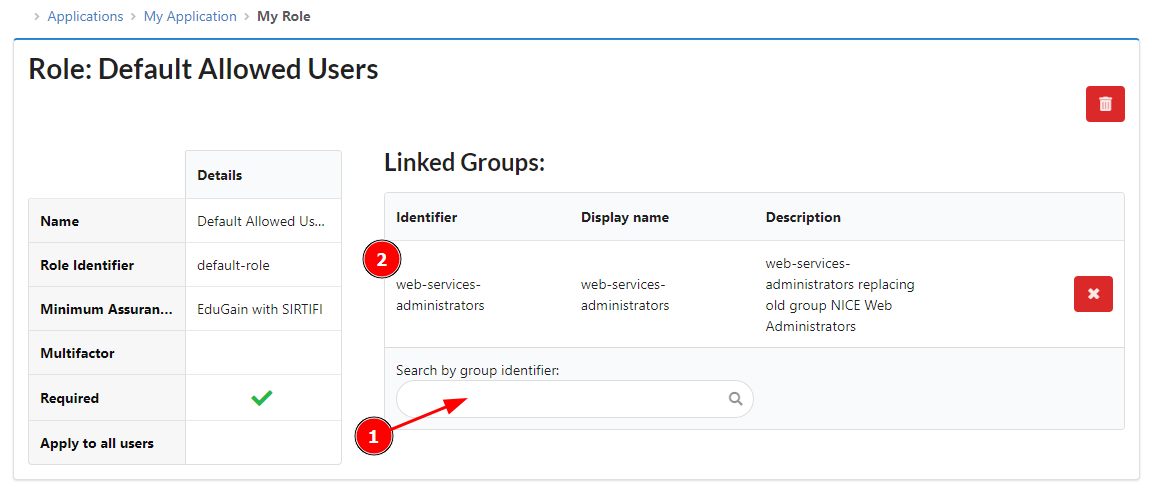
Voila, only members of the selected e-group will be able to access your https://<my-site>.web.cern.ch/ WordPress site.
Info
You must ensure that administrators of the WordPress site belong to the aforementioned e-group. Otherwise, they won't be able to administer your WordPress site anymore!
Troubleshooting
I've left Link Existing Users unchecked, and when trying to login with my CERN account, I get the following:
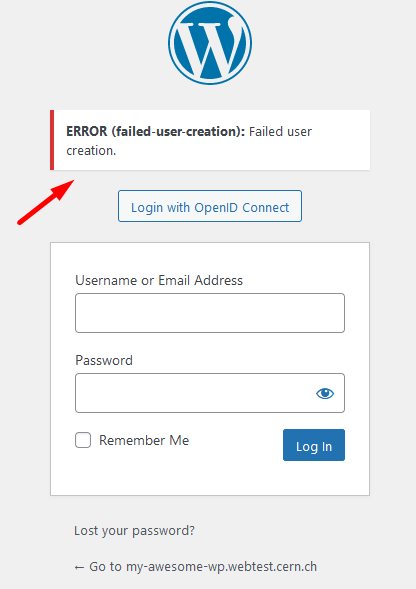
This happens when you are using the account that has been provided as the WordPress admin email (when creating the WordPress instance), and the value of the Link Existing Users is unchecked.
To mitigate this, ensure that Link Existing Users under the OpenID Connect Client settings is ☑ (checked).