Roles and Permissions
This page relates exclusively to WordPress Lite, a lightweight version of WordPress available between October 2024 and May 2025. It is no longer possible to create new WordPress Lite websites. We thank all WordPress Lite users and are happy to report that all feedback has been implemented and made available by default. This documentation will remain online and accessible until all WordPress Lite websites have been moved to the official WordPress Service.
Click here to return to the main WordPress documentation.
This document outlines the introduction of five new roles on the application portal for WordPress projects and how they can be configured. The new roles are designed to enhance project management capabilities and streamline user access control.
The application portal supports the following roles:
- Administrator: Full access to manage the project, including user roles and settings.
- Editor: Can edit content and manage certain project settings.
- Contributor: Can contribute content but requires approval for publishing.
- Author: Can write and publish their own content.
- Subscriber: Can view content and receive updates on content creation.
Project owners are responsible for setting up these roles within their projects.
The process involves associating eGroups for each role and configuring them on the application portal.
Before logging in the website, owner(s) must configure at least the administrator role.
Initial Configuration
1. Access the application portal
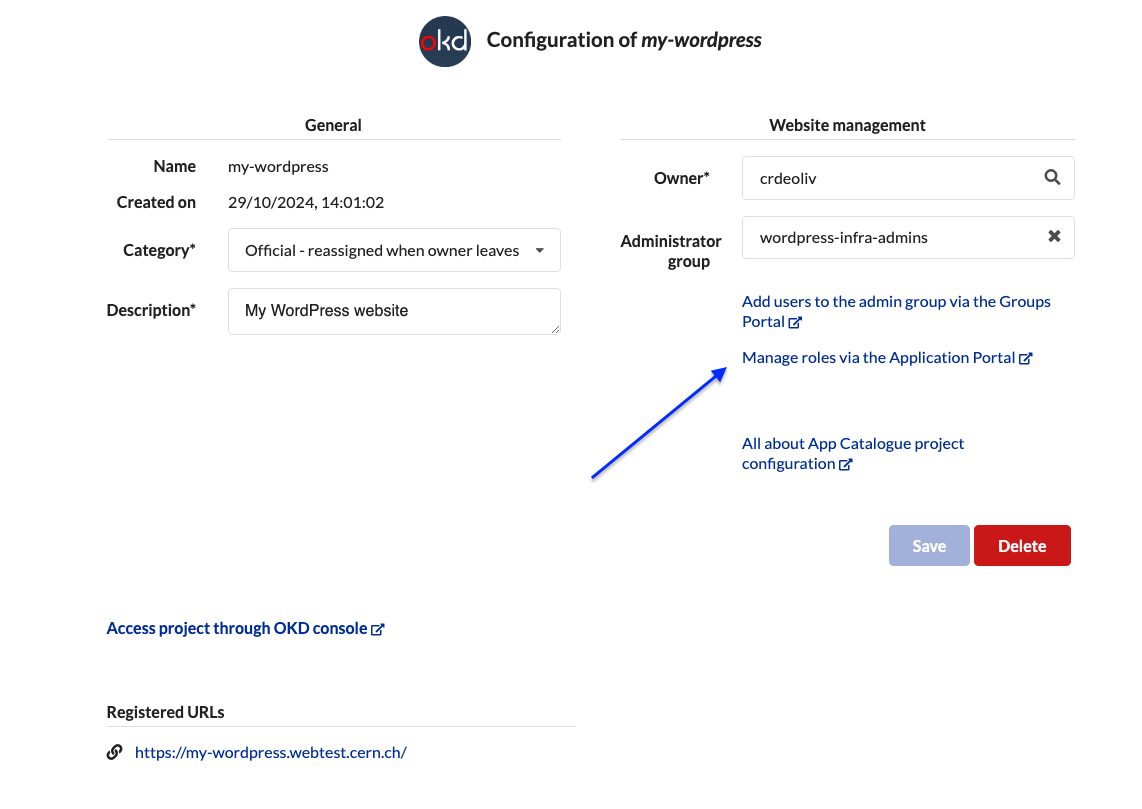
Project owner can navigate to the relevant WordPress project under their applications on Application Portal and clicking on the highlighted link Manage roles via the Application Portal.
2. (Optional) Create eGroups
This step is optional, skip if you want to associate existing e-groups.
Create e-groups in the linked platform.
3. Assign eGroups to Roles
Associating an eGroup for the Administrator role is mandatory. Other roles (Editor, Contributor, Author, Subscriber) are optional and should be configured based on project needs. On the "Roles" tab, select the "Assign Role to e-groups" button for each role.
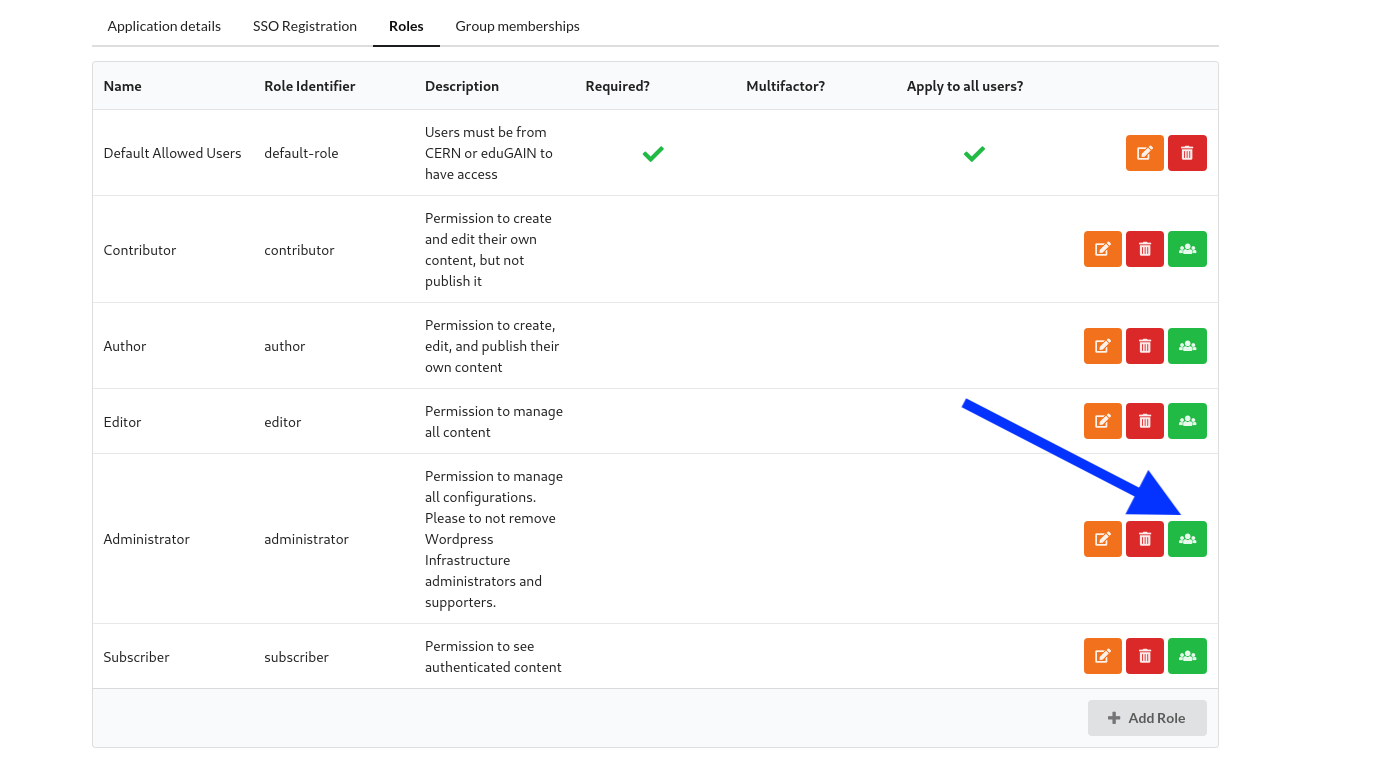
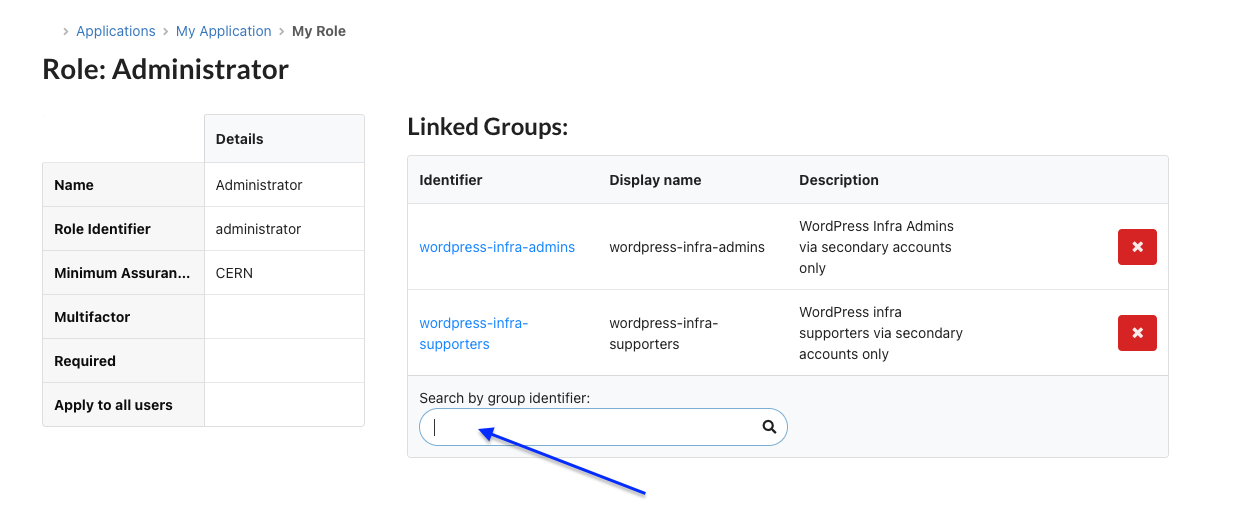
Select the relevant e-groups that you wish to assign to the role.
!!! danger
Do not remove the wordpress-infra-admins and wordpress-infra-supporters e-groups.
These are required for support and operations.
Restrict login access to specific users/groups
To manage login access to the website, we recommend you make use of the default-role. You can configure it according
to your needs, such as restricting to multiple e-groups or based on CERN's Levels of Assurance.
By default, login is restricted to the Minimum Level Of Assurance: EduGain with SIRTIF.
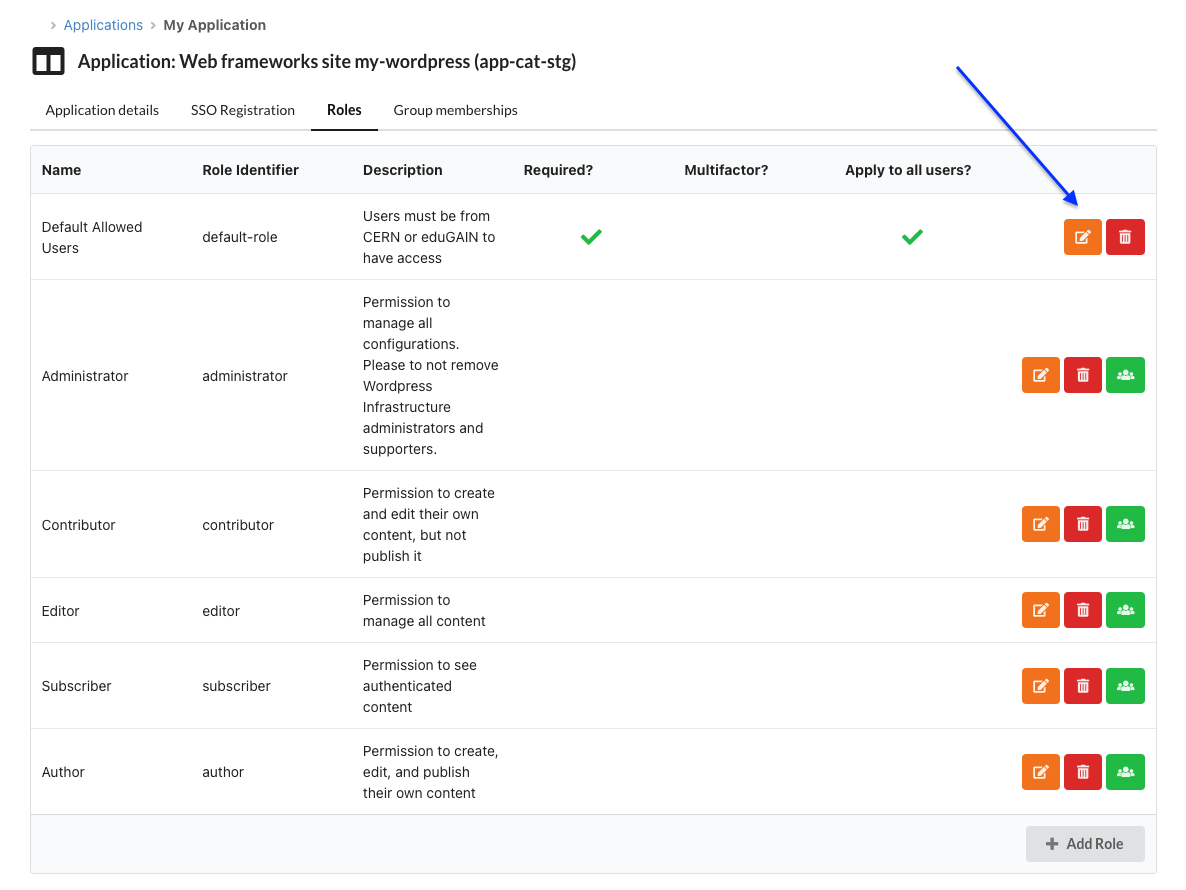
- Select "Roles"
- Create or Update a role, set it as Required, and add the relevant egroups
Now the website should only allow authentication based on the users.
Restrict entire website access to specific users/groups
To make the website private (fully behind SSO), you need to go to Settings > OpenID Connect Client
In this page, you will find a section called "Authorization Settings".
There is the "Enforce Privacy" which, as described, will require users to be logged in to see the website. The screenshot below gives how it should be seen.
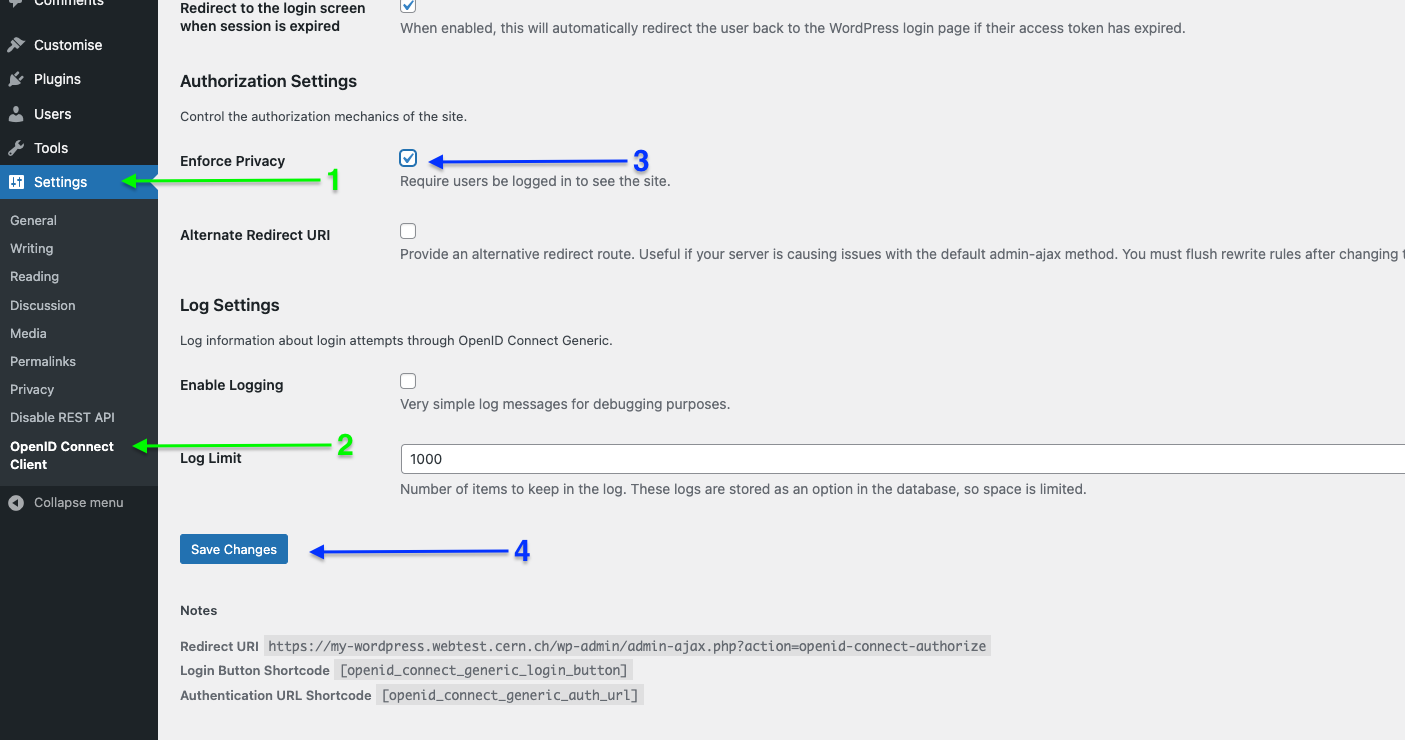
Once checked, go to the bottom of the page and press "Save changes". Now the website should be behind SSO.